Newsletter

Standard
Summary
Storytelling has been the focus of our entire unit this semester. Through the creation of our character masks, collage, and community islands have been the underlying themes that help develop and create a story. The arc of the unit stayed consistent and the connections between one lesson to the next became very important. It was amazing to see how dedicated the students were about their stories and their characters. Within each lesson, different aspects of story-building was involved. Within these aspects, the students explored art in fun, new, and inventive ways, and were able to get in-depth in the arc of what made up the unit.
  • Lesson 1: Ceramic Character Masks

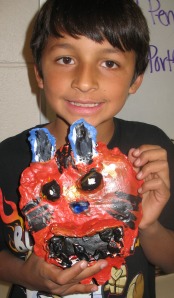
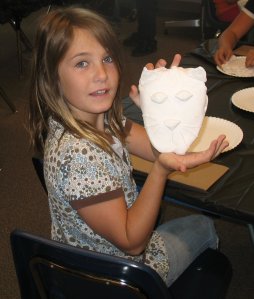
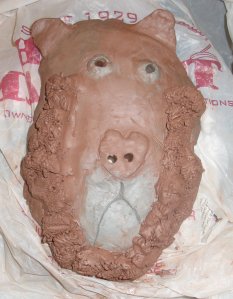
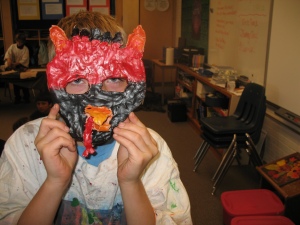
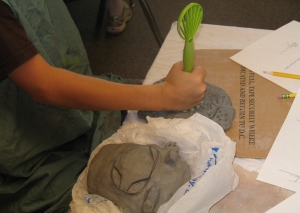
This project was an exploration into character development. Students created clay masks based on characters that were developed during brainstorming activities. The class learned about Native American totem animals and discussed how animals have personal meaning to each individual. Students were shown a variety of masks as examples to further their understanding of how character traits could be represented in the form of a mask. Students learned about the descriptive qualities of texture, shape and color.

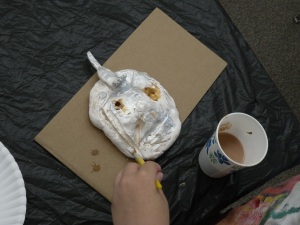
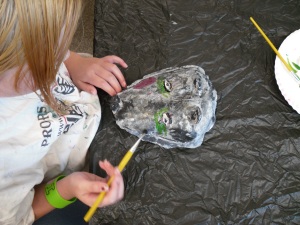
The class worked with a wide range of tools to shape and add texture to their masks.They used tools that were both traditional clay tools and non-traditional tools such as kitchen utensils.  The masks were then painted with acyclic paint.  Students layered colors to achieve texture and depth on the surface of their mask characters.

Within the context of our unit

  • Lesson 2: Brainstorming and Collage

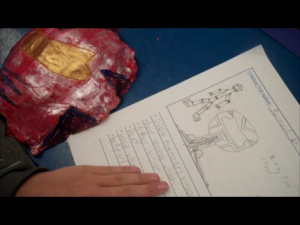
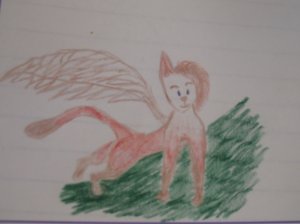
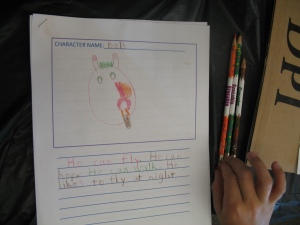
This unit began with the students creating a mask character out of clay. Brainstorming sheets were utilized by the students to develop their mask characters further. As you can see the students’ brainstorming styles were as unique as their characters. Some chose to draw, some chose to write, while others felt comfortable doing both.

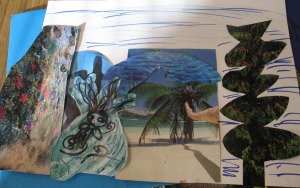
The next step was to create a collage which enabled the students to envision their mask character’s habitat. Through 2-D, 3-D, and mixed media collages the students created an environment for their mask character. These artworks depicted how it lived, what it ate, and even who its friends might be!

Both of these projects helped the students to develop their understanding of story building concepts such as character development and setting

  • Lesson 3: Community Islands

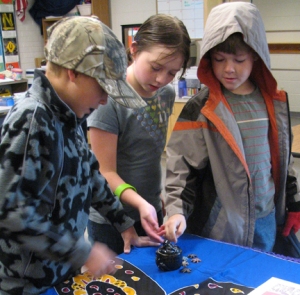
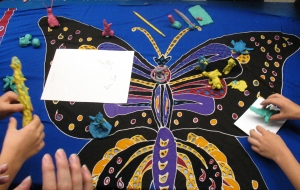
The Community Island project explored cooperative work. Each individual character that was created during our Storytelling Unit is represented in a cluster of islands. In order to combine ideas and worlds, the students had to work collaboratively. Space, form, and surface were all concepts the class explored through the construction of their islands, using mixed media and assemblage.

The students were enthusiastic to work with one another. They embraced the opportunity to create symbiotic relationships between their characters in an environment that can host multiple creatures. They were free to be innovative and apply critical thinking to their work. Considering how the scene would change in order to accommodate for different personalities and behaviors provided a unique challenge. The scientific concepts of habitat and symbiosis were solidified in their expressive examination. This project also incorporated the involvement of character relationships and story development.

Chart

How the standards were met in LESSON 1: During this lesson the students were first asked to write and draw about their mask character. After substantial brainstorming the students then proceeded to create a mask character in clay.

  •  Comprehend: Visual arts connect multiple characteristics of art. The students were able to recognize how mask are used to develop character. The students recognize that their masks can represent both physical attributes and psychological traits.
  • Create: Materials and processes can be used in traditional, unique, and inventive ways. The students were able to create their character masks from clay. In the process of creating their masks they learned to use different sculpting techniques utilizing conventional and unconventional carving and texturizing tools.
  • Transfer: Artists, viewers, and patrons respond to art from familiar and unfamiliar cultures. We discussed Native American totem animals with the class. It was explained that in this culture animals represent different personality attributes. For instance, the Wolf represents loyalty, perseverance, success, and intuition.

How the standards were met in LESSON 2: During this lesson the students asked to envision the environment in which their mask character lived. They were then given the instruction to create a collage to represent this habitat.

  •  Create: Visual arts communicate the human experience. The students were able to describe how a collage can tell a story about their mask character. Their collage depicted how and where their mask characters lived. The students continued their story building
  • Create: Applying an understanding of art processes and creative thinking to plan and create art. The students’ brainstorming sheets contained information about their masks characters, so the students used them to plan out their collages.

How the standards were met in LESSON 3: During this lesson the students were asked to work collaboratively in order to create a 3-dimensional habitat shared by their mask characters.

  •  Comprehend: Visual arts learning involves analyzing the formal and sensory qualities of art. Images were shown and discussed that illustrated how textures can be represented in art.
  • Reflect: Specific methods of planning support the development of intended meaning. The students were shown a video about symbiosis. This enabled them to understand the importance of working together and develop ways in which they could accomplish this.
  • Create: Materials and processes can be used in traditional, unique, and inventive ways. The students demonstrated this by combining elements of their 2-D collages with their 3-D collaborative projects. The also created their construction using a variety of media (mixed media assemblage: paint, construction paper, drawing, markers, cardboard and found objects.)

Process

The students explored many materials and processes this semester. They worked with clay, paint, construction paper, found objects, and cardboard. During our storytelling unit students demonstrated many important skills such as: self-direction, collaboration, and creative problem solving.

During the mask project the students strengthened their literacy skills through the brainstorming activities. The class developed lists of characteristics for their masks, they wrote elaborate stories about their characters, and discussed their work during video interviews. Through working with clay students developed an understanding of sequencing. Students learned that clay has to be fired before it can be painted. They also discovered some of the limitations of clay. As students were creating their masks, the clay would sometimes sag or crack. Students used their problem solving skills to build supports for their masks.

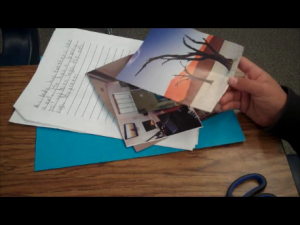
During the collage project students demonstrated self-direction and teamwork. The class spent one morning searching through magazines for images to include in their collages. While searching for their own images many students worked together to help others find what they needed. Students were continuing to develop their understanding of sequencing through the collage project. Their collages were an important step between the mask characters they had already created and the habitats that they were about to start creating.

The community island project taught the class about collaboration, and creative problem solving. By working together in small groups students had to develop techniques to construct a three dimensional habitat. Students worked with hot glue, cardboard, fabric, glitter, paint, pipe cleaners and many other found materials. Some materials presented challenges that students were able to work through together.

Art Show

The artwork displayed in the art show was truly a testament to how hard all of the Lab School students worked!! Observing all of the projects each class did was both exciting and awe-inspiring on both the teacher and student perspective. Stepping into the exhibition space was exciting and overwhelming. Art seemed to cover every last foot of that space! The students were able to look at artwork from their friends, from other grade levels, and also had the opportunity to see their own work in a new light than they had the past couple of weeks!

The artwork displayed from one grade level to the next was very telling about how lessons had to be structured and how units evolved over time. The 4th and 5th grade classes in particular was very interesting to observe- as the units were very similar but were approached in different ways. No two art pieces looked the same, which holds great hope to the innovation and level of creativity these students have!

The activity for the Art Exhibit intended to:

  • Recognize, articulate, and debate that the visual arts are means for expression
  • Use specific criteria to discuss and evaluate works of art
  • Critique personal work and work of others with informed criteria

This included discussing what kind of story a certain piece of artwork may be telling, as well as comparing two pieces of artwork in their similarities and differences.

Tom's Crew doing a "Compare and Contrast" between the aliens and robots made in Brittany's Class

While the exhibition was a lot of visual information to take in, the students commented on how much time and effort it took to produce so much art. It was really astonishing to see what we had accomplished in a small amount of time!

One detail we had picked up on the experience with the art show was the importance of “art language”. The right vocabulary is a tool that assists on approaching works of art aside from what the artist creates. Realizing texture, color, form and shape beyond what is “seen” will help these conversations along.

Nov. 11-The Community Island Project

Standard

Today, Ana had a dynamic presentation to show the students. It contained a short musical cartoon about the meaning of the word symbiosis and another short animation outlining what their next project was.  After working individually on their projects, The students will now be grouped into teams to create an island habitat. This means each partner will need to be able to share their ideas and skills and work cooperatively with their partner. The students greeted this idea with alot of enthusiasm and energy.

Some students preferred to work out their ideas on paper first.

Audrey and Mira proudly show off their community island ideas.

Talia and Nova discussing ideas for their shared project

Detail of Nova and Talia brainstorming sheet.

While other students preferred to start constructing their island community habitats right away.

Cyben and Rune adding some topographic details to their piece of the island.

Callae and Sam A. decided to incorporate their collages into the island project. Note that they also constructed a bridge that connects their island to the island that Rex will be working on.

Alexis' and Jasmine's habitat is already filled with carefully constructed items. In the background on the right you can see part of Peggy's wall construction.

Detail of Jasmine's and Alexis' habitat.

Detail of Jalen's hole and hatch. It is being incorporated into the piece of the island that he is working on with Adam.

One of the busiest places in the classroom was the hot glue station. The students regarded all the safety rules while intently building their island habitats.

The construction crew at the hot glue station. That's Sam W. and his house on the right.


Josh and Andre working together on their constructions.


Kai building at the hot glue station


Next week it will be fun to see how all these island habitats fit together into one big island community!

Understanding Setting through Creating Habitat Collages

Standard

To further develop their understanding of their mask character the class continued to work on their characters’ habitat. Through making these collages the students should be able to convey where and how their mask characters live. Ana discussed that when creating the collage a person looking at it should be able to understand important information about these mask characters. For instance, does a mask character like to live by the water, to fly, survive where it’s hot or cold, prefer to live high up in a forest or a mountain. What does your mask character like to eat and drink? Does your mask character have any friends?

Audrey just began her collage. But you can already tell what a warm and friendly environment her mask character inhabits

Talia's mask

Talia's mask would feel right at home in the aquatic habitat that she created for it.

Cyben wanted to convey so much information about his character's habitat that he used 7 sheets of paper!

 Some students also chose to create mixed media collages-which means that besides using paper, they could paint and draw onto their collages as well.

By Adam's smile you can tell he is proud of how he combined his drawings with his magazine images for his collage.

Mira chose to highlight her collage with painted details, and construction paper combined with magazine images. Because of the contrast between the paper and the images, the eyes really stand out for great effect.

Also this week the students were given the option to create their habitats in 3-D using cardboard. Some students chose to combine their 2-D collages with 3-D elements.

Peggy chose to highlight the food her mask character ate by mounting the grape image on cardboard. Her collage also demonstrates a good understanding of foreground and background

Callae also chose to incorporate a 3-D dwelling into her drawing of her mask character's habitat.

Some students chose to construct their mask character’s habitat entirely in 3-D.

Josh beginning to paint his volcano. Underneath the sheets of paper is a cardboard infrastructure.


Josh's fully painted volcano. He really worked hard creating his 3-D habitat-both inside and out.

Sam A. skillfully created a collage using a 3-D structure in the foreground and a very detailed 2-D collage in the background.


 The students really rose to the challenge of exploring a new material by displaying creativity and innovation.

Collages!

Standard

Today the class continued developing the habitats for their mask creatures. Last week Alice introduced collage making as a way to explore habitats. Today students spent most of the class finding and creating pictures that best fit their ideas of where their mask characters live. We had a few more interviews to do today, a couple students were finishing painting and many collages were made.

Rex, Nova, and Sam A. displaying their masks during the interviews.

Audrey and Kai finished painting their masks today

Sam A. found many images of space to illustrate the habitat of his character.

Callae kept her mask nearby as she worked on her habitat collage.

Talia found a lot of ocean images that worked well for her idea.

In addition to habitat, Alice suggested that students search for  images that would reveal more information about their characters; like the kinds of food they eat.  A few students really liked this idea.

Andre's charcater eats everything from hamburgers to granola bars.

Callae's character is a carnavore.

Alice introduced the idea of mixed media collage to the class today.  She showed examples that included paper and paint in collages.

Mira combined magazine images with construction paper to create her eyeball marsh.

Rune created a forrest from pieces of consrtuction paper.

Josh made a volcano using layers of construction paper.

Next week we will finish collages and record a few more interviews!

Character Building- Interviews and Intro to Habitat

Standard

Alice began class today by discussing everything that was going to happen during the course of the day. We had some students absent last week, and they needed to play catch-up so a small painting station was set up just for them. Other students were ready to write more about their characters, to solidify their thoughts and ideas about their characters. More importantly, Alice introduced the concept of portfolios! Every student was given a special folder that will hold their artwork, sketches, and brainstorming activities as they move along!

Brainstorm

With his mask nearby, Cyben is refining his brainstorming and writing out the characteristics, abilities, and behaviors of his character!

Today, we were wrapping up the character building segment of our unit, which meant one thing: interviews! Students were broken up into groups of three, and with guiding interview questions were asked to interview one another about their characters! The whole class has been working very hard on the development of their characters and today was their time to shine!

One student was given the role of interviewer, a second student was interviewee and the third person had the role of “time keeper” to make sure we wouldn’t go over four minutes per interview. After one character was interviewed, they had the opportunity to rotate within the group and take on another role.

Finished Character Masks

Nine completed character masks! CLICK ON THE IMAGE TO VIEW SLIDESHOW!

While students were interviewing, the students in the classroom were doing a variety of brainstorming activities. One, they were continuing the written brainstorming activity- which described the personality and behaviors of the character as well as their environment- and some actually spent the majority of the time writing! Alice also introduced the concept of collage. Bringing in magazines, the students were able to pull images that described their characters and the habitat that they live in.

Peggy's Developing Collage

Peggy found some great images to go with her character's habitat! She was looking for images of China and Asian scenery.

Sam W.'s Collage

Sam W. picking images for all of the homes for his nomadic character, Bob

Busy Table

Nova, Talia, Alexis and Jasmine working hard, searching through images in magazines!

We only got through a handful of interviews, and will continue them during our next lesson. Overall, it was a great day to get gears turning in the mind as well as completing thoughts on character and character development.

Character building- Mask making continues!

Standard

For most of today’s class students worked on painting their masks. Ana brought in some gold and silver paint which everyone was really excited about!

Some students started with the metallic paints as the main color for their masks.

Sam W got started with the silver paint right away.

Sam W then added more color to his mask.

Adam really enjoyed the metallic paints.

Rex used the silver paint for the "cybernetic" part of his mask.

Other students used the metallic colors as accents.

Nova began by outlining her mask with gold.

Nova started to fill in the center of her mask.

Kai used gold and silver to accent the features of his liger.

Alexis used gold to brighten the eyes of her cat mask.

Jasmine used the metallic paint along with other colors to design the surface of her mask.

Some students started to experiment with combining the metallic paint with other colors.

Rex painted gold over the red on his mask to create the look of fur.

Cyben added silver over the red paint on his mask which gave it a mechanical appearance.

Cyben was mixing a lot of different colors

Peggy discovered that if she mixed red paint with gold, it made copper!

Here are a few of the finished pieces

Callae's wolf mask. Callae layered many different colors of paint to build up the surface of her mask to look like fur.

Callae starting the second layer of gray.

Talia's finished mask

Peggy's finished mask

At the end of class we had everyone set up their work on a table so that we all could see the masks.

Alice asked students to describe what they saw in the masks.

Everyone wanted to share something about a mask. It was an engaging conversation!

When students were finished painting, they worked on further developing their mask characters. We heard a lot of imaginative stories about where these creatures live and how they interact with their environments. Next week students will be interviewing each other to learn more about these fascinating creatures!

Character Building- Mask Making Part 3

Standard

What a productive day!!

First we started the class talking about what we were going to do today. Some of the students were at a different stage of the mask-making process, and so we divided the room into two stations- one was the painting station (for masks that were already fired in the kiln and ready to go!) and the other was the clay station (where students were able to keep working on their masks)! We also had

an after-work activity which is an exercise on how to organize the thoughts on the character. Naomi made bullets on the white board on items of what to think about:

Alice shares her experience with frustration

Alice shares her experience with frustration!

  • What does the rest of the body look like?
  • Who is wearing the mask?
  • How do they communicate?
  • Where do they live? What is their habitat?
  • How do they move?
  • What do they do all day? What are their behaviors?

After discussing that, Alice shared a personal experience about frustration- and how being frustrated is part of the learning process, and that every artist gets frustrated! Most importantly, we discussed what to do if you ever got frustrated!

After discussion, Naomi called out the names of the students whose masks were ready to be painted on, while we distributed the in-progress clay work to their tables! It was interesting to see how the clay changed after they were fired in the kiln!

We talked about paint to the students who were painting for the day before giving them their painting tools.

Ready to Paint!

Alexis is showing her ready to paint mask! CLICK ON PHOTO TO SEE MORE STUDENT WORK!

In Progress Mask Making

The other students were still working on building their masks and some even started over! CLICK ON PHOTO TO SEE MORE STUDENT WORK!

As class went on, everyone was very busy and hard at work. The students on the painting side were thinking about the colors they needed to mix and colors they wanted to use. The students on the clay side were building up details and becoming very verbal about the stories of their characters! Once they were finished at their current task, they had the opportunity to draw the rest of their character’s bodies, and start writing about them in context. A lot of creativity was happening, and a lot of thought and dialog!

Working on clay

Near-finished and finished masks- ready to fire and to be painted next week! CLICK ON PHOTO TO SEE MORE STUDENT WORK!

Some of the students on the painting side also folded their palettes in half- an interesting study in color! It was exciting to see the colors they used on their masks in a different form!

Painting Exploration!

The painting side got a lot done, thinking about what colors meant on their masks, and figuring out how to mix color. CLICK ON PHOTO TO SEE MORE STUDENT WORK AND FOLDED PALETTES!

We ended today by meeting back together in our circles and talked about what was created today! A lot of character stories began to emerge, such as Rune’s mask, which is a hawk, snake, fox creature that is attracted to forest fires. Also, Rex’s half mask that is half fox and half cyborg- his character being injured during a fight with a bear, and rebuilt with cybernetic parts! The wheels are turning and the students are starting to think about the kind of world their characters interact in! More importantly, they shared how this is shown on their masks, such as Adam’s Loch Ness/Moth Man character, which he added gills to so his character could live both in water and in land!

Circle Time

Andre shares what creatures his character is made up of, as it turns out he's very multidimensional!

Thinking about body and environment

Peggy's creature has a body now and a context- she lives in a barn in Iceland!

Thinking about color and behavior

Sam W. used words to describe "Bob" and his behavior, and is also mapping out colors he wants to use!

Again, a very effective day! A lot of planning, creativity, and more importantly- story telling taking place!

Aside

During our class circle meeting we told the students that our teacher had us create our own masks. He felt that this would enable us to better understand how to help the students make their own masks. Ana was the first to show and talk about her mask. She described it as being a combination of 3 animals. She then asked the students if they could describe what type of personality it was judging by its characteristics.

Ana's Mask-"Coyelle"-a combination of eagle, elk and coyote.

Rex really scrutinized the mask and came up with some really good observations. He commented on the orientation of the beak and eyes and said that it animal made the animal look sly. Mira addid that it also might by stealthy!

Naomi's Mask-The Catogator, which the students thought was SCARY!

Naomi was the next to discuss her mask. One of the students commented that it must see well because its eyes were so big. Another student thought it was greedy because its mouth was open wide.

Alice was the last to discuss her mask. She decided not to describe her mask first. She wanted to let the children try and figure it out just by looking at it. One student commented that it might thoughtful because of the sun lighting up its forehead. Another student said that the blue on its chin reminded her of waves, so maybe it liked  the ocean.

Alice's Mask

We thought that all the students comments articulated keen visual observations and thoughtfulness. This ability will help them to create masks of unique and interesting character. However before proceedingwith the masks we felt that the class needed a refresher lesson in slipping and scoring-a clay attachment technique.

Peggy, a student who has worked with clay before, volunteered to do the demonstration

We provided the students with various tools, so that they could use different textures on their clay masks.

Here a student is testing out the texture an avocado masher makes on a piece of scrap clay. What a great idea! This will allow him to decide whether or not he should apply this texture to his mask.


A student is using a lemon juicer to make "hair". She has already applied some to her mask.

By pushing clay through a small strainer this student created "fuzzy hair". It looks as though she has not decided to to use it on her mask.

We also provided image references. The students were able to refer to these and obtain inspiration.

This student is emphasizng the eye of his liger mask by surrounding it in different colored clay. He also chose to emphasize the mouth in the same manner.

This student is working on his mask with both hands! His right hand is poking a hole in the clay for the eye. While his left hand is creating a texture by scraping away lines. Good demonstration of the subtractive technique-which Naomi showed the students at the start of class.


In this almost completed mask another student also chose to make the mouth out of a different color. This really helps to accentuate the expression of happiness and contentment.


This student chose to incorporate both animal and landscape elements into her mask. Notice the sea turtles for the eyes and the starfish nose.


In the next lesson the students will be enhancing their masks with paint! From what we have observed so far the character masks should continue to develop in interesting and unique ways.

Ana, Naomi, & Alice

Character Building-Mask Making Part 2

The Second Chapter- Character Masks [Clay]

Standard

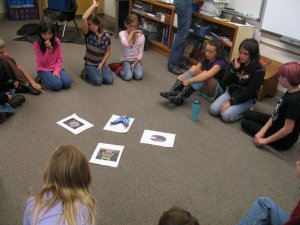
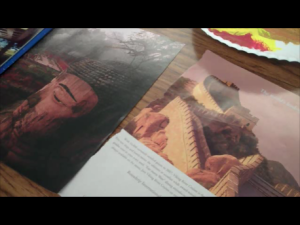
Continuing from what Ana introduced last class, today we looked a little bit closer at Native American masks, and how certain animals represented certain characteristics. We sat around in a circle and Naomi had some pretty interesting pictures and a mask sitting in the middle of the circle.

Mysterious objects!

Mask examples are found in the middle of the circle! What kind of characters do you see in these masks? How do you figure that out?

We talked about how masks portray a character as well as a feeling, and how the personality can be shown! Students brainstormed thinking about the features of the face that express personality or feeling! Arrangement of eyebrows, the position of their mouths (is it a smile or a frown?), and the shape and effect of the eyes were all ideas students discussed in the circle!

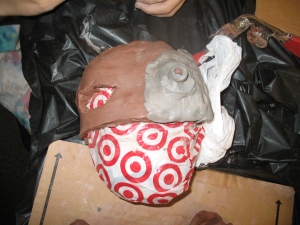
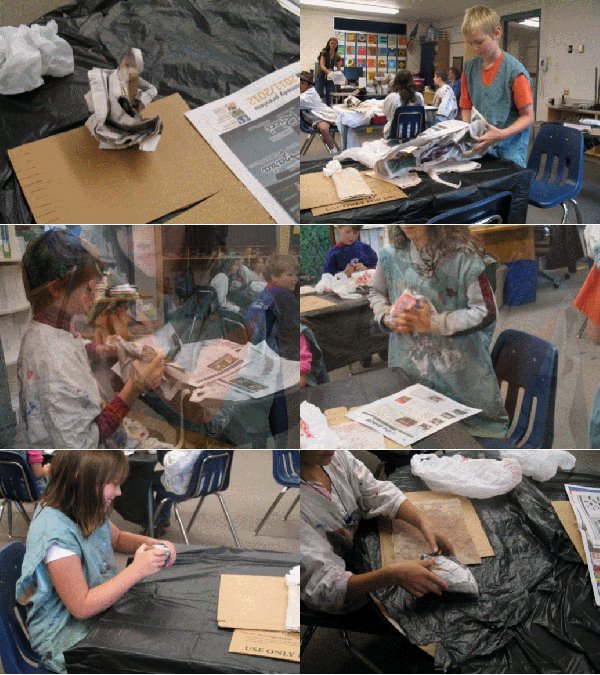
After a discussion, the students were sent off to their tables- which were all set up and ready to go for the exploration in clay and mask making! First, they had to grab smocks to cover themselves up (clay is very messy!) and a newspaper, and bring it back to their seats! Naomi asked the class what an armature was, and explained that it was something that is used to help hold up a sculpture- in this case, it helps shape the mask! Using newspaper, she instructed the students to crumple up the newspaper to the size they want their masks to be, and went around with tape so they can keep shape underneath the clay.

Armature gif

Process of making an armature! Click to see the slideshow!

The armature is all done! They were then wrapped in plastic bags, and were given their clay. They had choices between red, white, and brown- though they had the option of doing a combination of the three. Either way, the students would be able to paint them after the masks are fired in the kiln. For now, the students had to learn how to flatten the piece of clay out and to make them to thinner slabs as a base to wrap on top of their armature. Naomi showed them several ways, and some of the students decided to experiment on their own!

After sitting their base slabs on the armature the students had the chance to finally start working on their characters! While many chose animals that they felt a direct connection to (totem animal), they were asked to consider the personality traits and characteristics of their animals or creatures that they were creating. This helps develop the character’s story! While they worked, they discovered different effects and textures they could achieve through various tools, the significance of detail, and problem solved along the way!
Overall, everyone did great work, and are well on their way to grasping how to develop their characters!

The First Lesson-Storybuilding

Standard

We are so excited and happy to be here!

Before the official start to the lesson we thought it would be a good idea to introduce ourselves to the students. We did this by talking about a piece of art that we made and then an artwork by an artist that we liked. While discussing the artwork we introduced certain elements that would be included in the lesson about storybuilding. Our artwork was displayed on a table, so that the children could look at it and touch it.
Our artwork-Bottom left: Naomi-Ceramic Jar with spiders, top left: Alice-Self-portrait print, and at right: Ana-Needle felted scene

Sam W., Callie, and Adam were really interested in Naomi’s ceramic spiders!

Ana about to read the "Wise Owl"

After the children had gone back to their seats Ana explained what her lesson was to be about. The art of Storybuilding and what makes a good story. Since she was reading a Native American myth called Wise Owl she asked the children if they knew what a myth was. Only a few raised their hands. After a small discussion it was determined that a myth is a story that describes something in nature that talks about its origin or beginning. The students felt it was a fictional story.  This myth explains the meaning behind the phrase “wise as an owl”. In it there are 3 characters: Everything-Maker (to be read by Ana), rabbit and owl. Ana asked for student volunteers to read the parts of owl and rabbit.

Jalen reading the part of Owl

Rune reading the part of Rabbit

After the story was read Ana asked the students to list characteristics of each character. The kids named physical attributes as well as personality traits. Good listening by all! To get the children to understand what goes into developing a character she asked them to create one either from the story or one of their own choosing. They were given the choice of drawing one using markers or pencil or to make one out of clay! Almost all of the students chose CLAY!

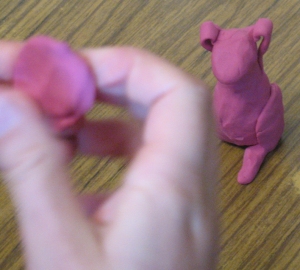
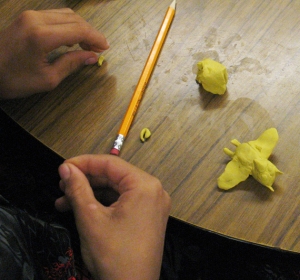
It was fun to watch the students' creatures begin to take shape.

Personalities begin to develop with added detail.

After the students were finished they displayed their clay creatures and drawings on the table. They were then asked who wants to tell a short story about their creature.

Apparently, everyone did! Ana had a really tough time choosing.

Talia sharing the story of her creature. (Sam A. seems very interested!)

Kai showing his creation to the class.


Please Note: Due to space constraints we were unable to post pictures of all the students creatures creations. However, the students can have the photos taken of their work.

The kid’s enthusiasm and energy was wonderful!
We are looking forward to our next class!
Ana, Naomi, & Alice